DURALOK VINYL EXTERIOR SHUTTERS
Installing Shutters with Shutter-Loks
For use on:
Irregular surfaces including: wood, aluminum, vinyl, hardboard, brick, masonry, stone.
Required for Installation
Screws (included with Duralok purchase)
Electric drill
1/4" drill bit
3/8" drill bit
Hammer
Step 1:
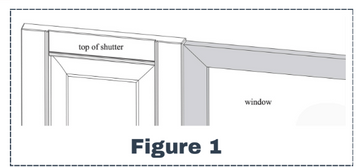
Place the shutter next to the window and mark
desired location against the wall or window.
See Figure 1.
Step 2
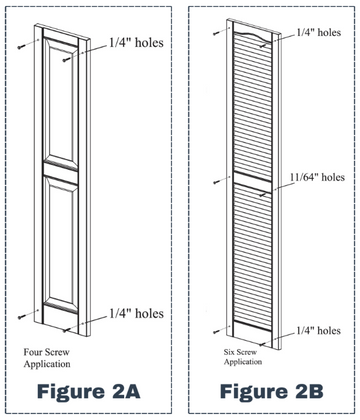
When installing shutters smaller than 55", drill
(4) 1/4" holes in the locations shown in Figure
2A at right.
If the shutter is 55" and over, drill (4) 1/4" holes
and (2) 11/64" holes in the locations shown in
Figure 2B.
Step 3:
Reposition the shutter against the wall and screw it into place using the screws provided.
Do not over tighten the screws. When installing a shutter 55" and over, screw the two center screws in first (the screws using the 11/64" holes).
NOTE: To remove shutters do not attempt to pull out the
Shutter-Loks. Simply use a pair of snips and slide them behind
the shutter to cut the Shutter-Lok off at the shank.